Web development has come a long way. We've gone from building static pages to dynamic web apps and now, we're venturing into the exciting realm of AI in web development.
Tensorflow.js allows you to harness the power of Machine Learning directly in the browser.
Combining it with the flexibility of Next.js, the possibilities are vast.
Why Tensorflow.js in a Next.js project?
Next.js has always been about providing the best developer experience with features like hybrid static & server rendering, TypeScript support, smart bundling, and route pre-fetching.
Now, imagine blending that with the capabilities of AI.
Tensorflow.js is an open-source hardware-accelerated JavaScript library for training and deploying machine learning models in the browser.
This means you can:
- Run Pre-trained models: Access an array of pre-trained models for various tasks.
- Train on-the-go: Train new models right in the browser.
- Integrate easily: It's JavaScript. Integrating into a Next.js project is seamless.
A Concrete Example: Image Classification in Next.js
Let's dive into a simple example where we'll integrate a pre-trained model to classify images in a Next.js application.
Setting Up
Create a new Next.js app:
1npx create-next-app tensorflow-next-example
Move to your project directory:
1cd tensorflow-next-example
Install the required packages:
1npm install @tensorflow/tfjs @tensorflow-models/mobilenet
Implementing Image Classification
- Creating the Input Interface
In pages/index.js, set up an input field for the user to upload an image:
1export default function Home() {2 return (3 <div>4 <input type="file" onChange={handleImageUpload} />5 <p id="prediction"></p>6 </div>7 );8}
- Loading the Model and Making Predictions
Now, let's write the handleImageUpload function:
1import React, { useState } from 'react';2import * as mobilenet from '@tensorflow-models/mobilenet';3import * as tf from '@tensorflow/tfjs';45export default function Home() {6 const [img, setImg] = useState(null);78 let model;9 async function loadModel() {10 console.log("Model loading..");11 model = await mobilenet.load();12 console.log("Model loaded..");13 }1415 loadModel();1617 function handleImageUpload(event) {18 const image = event.target.files[0];19 classifyImage(image);20 setImg(image);21 }2223 async function classifyImage(image) {24 const img = new Image();25 img.src = URL.createObjectURL(image);26 img.onload = async () => {27 const predictions = await model.classify(img);28 document.getElementById("prediction").innerHTML =29 `Predicted:<br /> ${predictions.map(p => `${p.className}: ${p.probability.toFixed(2)}`).join("<br />")}`;30 };31 }3233 return (34 <div style={{ textAlign: 'center', marginTop: '4em' }}>35 <input type="file" onChange={handleImageUpload} />36 <br />37 <div>38 <p id="prediction"></p>39 <br />40 {img ? <img src={img ? URL.createObjectURL(img) : null} alt="upload-preview" style={{ maxWidth: '100%' }} /> : null}41 </div>42 </div>43 );44}
The above code does three main things:
- Loads the MobileNet model when the page is initialized.
- When an image is uploaded, it calls
classifyImagewhich processes and classifies the image. - Displays the prediction on the page.
Let's Test Our Code
Run the server:
1npm run dev
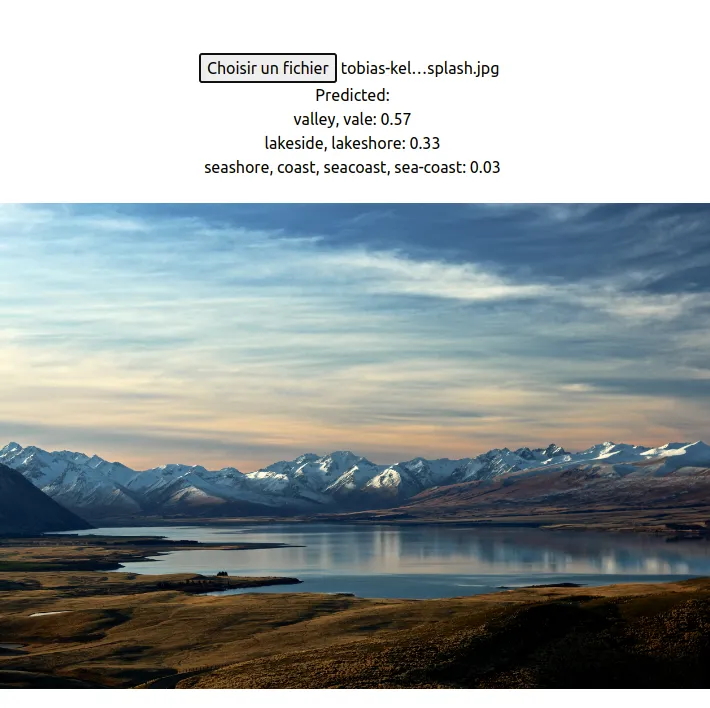
Go on http://localhost:3000 and upload an image.
You can test this with several images. Predictions will change according to the image uploaded.
Pretty cool, eh?
With my image, TensorFlow predicted a valley, a lake, and a seashore. Pretty accurate, isn't it?